Tuesday, March 9, 2010

Some mucking in maya...

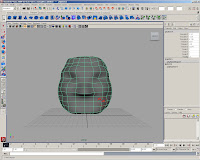
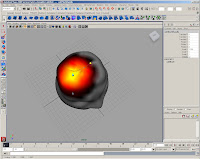
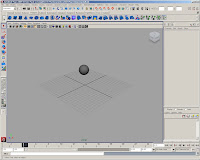
What better way to learn than trial and error. The following example is from sculpting a polygon sphere. I have slowly morphed sections of it to appear to look like the outline of a face. This has very little detail other than its structure, but I now have a better understanding of the sculpt geometry tool and the soft modification tool.


Basic head shape:


Editing using the sculpt geometry tool:


Editing using the soft modification tool:


Some of the short cut keys for these tools are similar to photoshop which made it esaier to understand. For exmaple, when using the scultp geometry tool, togling between holding "Ctrl" and clicking would change which way the sculpture was being modified, either inwards or outwards.


Click on images to enlarge...

Wednesday, March 3, 2010

Some research books...

One of the BIT lecturers, Patricia, lent me some books about 3D animation including a maya book "the art of maya".

I will use some of these to help understand how to create and develop 3D objects and characters.
These books are:

  • the art of maya. Alias wavefront.
  • Game Character Development with Maya. by Antony Ward. New Riders.
  • Learning Maya 6. Fountation. Another Alias product.
  • 3D Creature Workshop. By Bill Fleming.
They are a little dated but still help explain the basic functionality and terminology for maya.

Monday, March 1, 2010

Research ideas about a project..

After looking through a book and DVD set from Su (Pictoplasma maybe??), I found some interesting styles that I liked. Some of these were not 3D but the story line and themes to them were amusing. Some of the short animations from the DVD that I liked are:

Chris Hardling's animation about George learning self defence - This was not 3D but the story line and humour was very well portrayed.

A 3D MTV add - This one was in a very dark room with a high placed TV, the feeling from this was mysterious and kind of weird. But everything had a creapy design to it and looked in place.

Lego space animation - The idea of using "lego" style characters would be easy to recreate and construct as they are all the same style. Lego designs have been used in many ways for games such as Lego racing and the Lego star wars series, so there would be many ways to branch off that.

Comic book lego looking fight - This was a fast paced 3D animation, again using the simple lego style shapes for characters. The detail and flow from page to page was impressive. I am considering this as a possible style for my project.

3D Radio teddy bears - This comedy animation was designed around a English radio talk back show. The look of this seems to be a very casual radio environment with a couple of out-of-place fluffy looking teddy bears, who appear to be the hosts. They have no mouths so all the interaction between the 2 is through facial expression (raising eyebrows, face muscle movement etc). This was an interesting way to go about it. Doing it this way would mean less fiddling around with mouth movements. Mouth movements to a voice over would be hard to do because for each character speaking, the shape of the mouth has to match the sounds of the words spoken, other wise it just looks like a bad Aussie cleaning products add. I am also considering this approach for my project.

3D Robots in the realistic environment - This was very realistic. It would possibly require a lot more knowledge than what I will gain in a semester to understand how to implement. The robots have been drawn overtop of a video, and rendered to look like they are interacting with the other objects in the video. The robots have a sleek realistic look them, with added effects to allow surrounding objects to reflet onto them and shadows cast depending on where they are standing. Eventually, I would like to create this sort of 3D effects and creations, but for now it will be a little bit beyond my knowledge.

More research needs to be done to help develop ideas, styles and what I am going to create.

My very first animation...


Before you learn to walk, you have to learn to crawl. This is my approach to 3D animation. My first animation consisted of a basic NURBS sphere, not rendered any pretty colours or added effects, just a simple sphere which I animated using the time slider to "bounce" up and down.
The animation loops so when run, it looks like a ball continuosly bouncing up and down to the same height. It consists of 3 frames.
Frame one contains the sphere shape at the centre of the grid base.
Frame 2 is the same sphere but moved up vertically.
Finally, frame 3 is the sphere moved back down vertically to its original position but has been scaled to look squished (wider rather that perfect radius all around). This will give the illusion of a physical impact.
After running it for the first time, the ball looked like it was on speed! The key frames needed to be made further apart to make the balls size and weight appearance match its falling and bounce time.
I will look into how many frames per second maya defaults to and how to change it.


Tuesday, February 23, 2010

Learning how to use Maya

By using Maya's built in tutorials, I now have a basic understanding of how to operate the software.
The tutorials consited of 7 sections:
1.Zoom, Pan & Roll: Navigation Essentials.
2.Move, Rotate, Scale.
3. Create & View Objects.
4. Component Selection.
5.Discover Secret menus.
6.Key Frame Animation.
7. Preview Render.

Each of these covered the basic "how to" for their section, but there is still a lot that I don't know how to do. My next plan is to work through each of the sections and try to mimic what was shown in the tutorials.


1. Zoom, Pan & Roll: Navigation Essentials.

To get a close up = press F.
To spin the view = Alt + Left mouse click.
To track or pan = Alt + Middle mouse click (scroller).
To zoom = Alt + Right mouse click.

2. Move, Rotate, Scale.

A perspective view is a single view. To see everything more clearly, press the space bar to go into an orthographic view mode.
You can move, rotate and scale objects by using the corresponding symbols in the left tool bar. Parts of objects are called components.
Objects are made up of 3 axes. Each axis has a different colour to help differentiate between the three.
Red = X.
Green = Y.
Blue = Z.

To mainpulate an object in one of the directions, drag a handle in the direction you want. Use the central handle to move the entire object more freely.

3. Create and View Objects.

Objects can be NURBS or Polygons.

Polygons are made of faces put together. Each face is flat.
NURBS are made of curves and are smooth.

--------------------------------------------------------
Q: Other than being smooth, what is NURBS??
A: Non-uniform rational basic spline (NURBS) is a mathematical model commonly used in computer graphics for generating and representing curves and surfaces which offers great flexibility and precision for handling both analytic and freeform shapes.

ref: http://en.wikipedia.org/wiki/NURBS
--------------------------------------------------------

To create = Create + Polygon(or NURBS) Primitives + Select shape.
Click and drag out to create the base, then up to create the depth of the shape.

The Channel Box (to the right) displays the information for an object.
It contains the transform attributs = Scale and location (are at the top).

To view shapes attributes such as radius - click on the word under INPUTS.

To view shadded objects = press 5.
To view objects wire frames = press 4.

To adjust a NURBS smoothness = press 1, 2, 3 (depending on the smoothness).
Note: This doesnt change the real shape of the object.

4. Component Selection.

Object mode = Entire NURBS and polygon surfaces.
Component mode = parts of an object.

Starting in Object mode:
To select a component such as a polygon face, press and hold over the polygon object with the right mouse button nd select "face".
Click on the dots or drag over the faces to select through all of them.
NOTE: when objects overlap you select through all of them.
To deselect all click on nothing.
To add to an existing selection, hold Shift and click on unselected faces.
To deselect faces, hold the control key and click on the unwanted ones.
To work on the entire polygon again, use the right mouse button menu and choose select.
Selecting NURBS components is similar. Right click surfac points.

5.Discover secret menus.

Menus are grouped into menu sets
-Lists at top left of screen.
To see more features, change the top options.
Change the menu set to surfaces, dynamics or rendering by selecting from the list.

There are menus with actions for each panel and windows.
For menu options, select the box at the right of the menu.
Adjust the settings, then click the "apply and close" button.

To see a marking menu, press and hold over top of the object with the right mouse button.
The marking menu items change depending on what you click on, to let you quickly access common commands for that object.
To display the Hotbox, press and hold the space bar.
The Hotbox is an advanced method to get menus quickly. It is a customisable collection of menu sets and marking menus.

6. Key Frame Animation.

Use the time slider to control an animation (located at the bottom of the screen).
To animate an object or attribute, first select the item and then press "S" to set a keyframe.
The keyfram appears in the time slider (virticle red bar).
To change the current frame, click another frame number in the time slider using the left mouse button. Then move, rotate, or scale the object, and press "S" to set another key frame.
Repeat these steps to set up as many keys as you need.
Use the time slider to change the frame, then change the object attributes then press "S".
Press play on the time slider playback controls to play back a looping animation. Press stop to end it.

7. Preview Render.

To see shadded objects, press 5. To change the look of an object, press and hold over the object using the right mouse button to view the marking menu and then select assign new material.
Select from this list of different materials. The attribute editor displays.
The current swatches let you adjust the material attributes such as colour. Click the swatch for the colour attribute. Adjust the colour then click accept.
To see the list of textures, click the map button (right of the colour in common material attributes, looks like a 4 square checkered flag.
Select one of the textures to apply it to the material.
To see the texture on the object, click in the view and press 6.
To render the current fram click the icon (looks like a white movie clicker).
Default quality is for a quick preview.
Click the white movie clicker icon with the 2 circles next to it to view the Render settings window.
Adjust the render quality settings or change the rendering type here and render again.


The help menu also has more tutorials.
Sunday, February 21, 2010

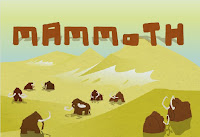
Scott's Mammoth Animation.


http://scotteablog4.blogspot.com/

The style used in this animation is very flat based and looks alot like some of the older nickelodeon cartoons.
There has been a lot of thinking into the details that needed to be included in this project to make it really effective. For example there is a lot of sound files which really help to improve the feeling of the cartoon by backing up characters movements. Another aspect that I thought was effective was the different way some frames were displayed. Some of the more faster scenes where shown with the characters involved and streaked blurring of the background. Even though the graphics are only 2D this really helped to show the viewer different speeds.


Other scenes I thought were effective was when the small alien was slashing all the mamoths. all you could see was the actual "slash" through a black scene. The "slash" was more or less what you would expect on a very shiny smooth surface, whiped under rays of light.


The imagry in this was amazing and the story line was very clever. The only thing I would change is add a "play again" button at the end.

http://midnightheist.deviantart.com/art/Mammoth-animation-143201983

Tasks:

  • Create Blogger account - done
  • Join Moodle. - done
  • Think about a project.
  • Look into different styles of 3D animation to use. - done.
  • Check out Scott's mammoth animation - done.

Learnt the hard way - blogger does not accept html written inside of blogs... oops..