In this lesson, you learn how to:
■ Set keyframes for animatable objects and their attributes.
■ Use the Time and Range slider and Playback Controls to control the
playback.
■ Use keyboard shortcuts to set keyframes.
■ Use the Graph Editor to view animation curves.
■ Modify the animation of objects using the Graph Editor.
■ Set preferences to increase the playback quality.
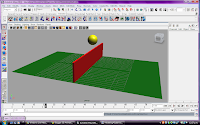
By using the graph editor for this task, the motion of the ball had a more realistic curve/bounce to it.
Lesson 2: Set Driven Key.
In this lesson you learn how to:
■ Link the object attribute behavior between two objects which will link the
movement of one keyframed object to another with no keyframes assigned.
■ Use the Graph Editor to adjust the animation for the driven object.
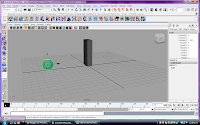
The motion created here happened when the ball moved towards and away from the oblong. When the ball got closer the oblong would rise up to a set position. Once the ball had passed through or moved away, the oblong returned to its original position.
Lesson 3: Path Animation.
In this lesson, you learn how to:
■ Set an object to animate along a motion path using a NURBS curve as the
path.
■ Modify the timing and rotation of an object along a motion path.
■ Blend between keyframe and motion path animation.
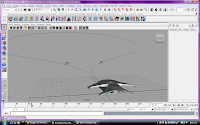
This was very tricky to get right. The position of the air craft needed to be set to correct points for it to work properly. If I was to replicate this sort of animation from scratch I would need to plan out the placement before hand so that it would look realistic.
Lesson 4: Nonlinear animation with Trax.
In this lesson you learn how to:
■ Key animation sequences for use as nonlinear clips in Trax.
■ Create clips from your animation sequences for use in the Trax Editor.
■ Use the Trax editor to position, modify, and arrange clips in order to create and modify animation sequences in the scene.
■ Scale clips to modify the timing of an animation sequence.
■ Trim clips to remove unwanted motion.
■ Cycle clips to create motion that repeats.
■ Use the Graph Editor to modify the animation of a clip.
■ Use the Trax Editor to work with motion capture data.
■ Reuse clips using the Outliner and the Visor.
Part 1:
This was even harder to get right. There's so many more points that need to be considered and then setting them into trax was confusing.
Part 2:
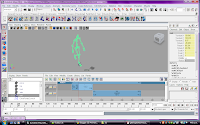
Moving an animated skeleton and getting them to rotate their direction.
This was using trax as well and already had some animation built into it. I would have preferred that it didn't so that I could learn how to combine a skeleton to a polygon shell and then animate it to move as I have had a lot of difficulty in trying to get this right.
Once the moving skeleton was in a trax clip it was easy to make it rotate.
Once the moving skeleton was in a trax clip it was easy to make it rotate.
Other Notes:
Blending clips
You can blend the animation between clips. Blends allow you to create smooth
transitions and mixes between different motions. A blend can be applied
between any two clips that overlap entirely, partially, or not at all. The best
results are obtained when blending between similar motions. In some
situations, a blend can be used to correct jump cuts. For more information
see Create and edit blends in the Maya Help.
Key into clip
You can set keyframes to alter the animation within a clip. This process is
called Keying into a clip. When you key into a clip, keyframes are placed at
the current time on all the animation curves in the selected clip. For more
information see Key into a clip in the Maya Help.
Time Warps
Time Warps let you change the timing of a clip without modifying the clip's
animation curves. You modify the Time Warp by editing the animation curve
that controls the warp. Time Warps can also be used to reverse the animation
in a clip. For more information see Create and edit time warps in the Maya
Help.
Visor and Outliner
Both the Visor and Outliner can be used to access clips. The Visor provides a
graphical interface to access other resources (such as clips, poses, shaders,
textures, and brushes) in your scene. The Outliner displays clips in a textual
manner, and is a bit more compact.
Audio clips
You can display and play multiple audio files in Trax allowing you to
synchronize your motion clips to specific audio events (sound effects, musical
notes, drum beats) in the audio file. Once you import an audio file into Trax,
you can then move and rename the audio clip. For more information see
Work with audio in the Maya Help.
Lesson 5: Inverse Kinematics.
In this lesson you learn how to:
■ Create and use hierarchies to define logical relationships between
animatable objects.
■ Combine the components of a 3D mechanical arm model into a
hierarchical grouping.
■ Construct a skeleton for use with IK.
■ Combine the skeleton with the mechanical arm model by parenting the
components into a hierarchy.
■ Create an IK system to allow the skeleton hierarchy to be posed.
■ Create a control object to manipulate the IK system.
■ Use constraints to control the position and orientation of components
within the IK system.
■ Limit the range of movement on the IK system.
■ Pose and set keyframes for the IK system.
■ Animate an object by constraining its motion to two or more objects.
*images to be put up.
No comments:
Post a Comment