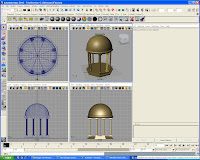
Introduction
Lesson 2: Creating, Manipulating and viewing objects.
In this lesson, you learn how to:
■ Create 3D primitive objects.
■ Select objects for manipulation and editing purposes.
■ Move and rotate objects using your mouse.
■ Move, rotate, and scale objects using numeric input.
■ Duplicate objects.
■ Change the viewing panels in Maya using a variety of methods so you can
view your objects from different points of view.
■ Undo actions when you need to undo a particular task or step.

Lesson 3: Viewing the Maya 3D scene.
In this lesson you learn how to:
■ Understand the difference between moving objects in the scene and moving
the point of view on the scene.
■ Use the dolly, track, and tumble camera tools to change the view of your
scene in both the orthographic and perspective views.
■ Rotate objects using the transformation tools in the Toolbox.
■ Select objects using a variety of techniques.
■ Group objects together so they can be transformed as a unit.
■ Display objects in both wireframe and shaded modes.
■ Use additional primitive objects and options.
Lesson 4: Components and Attributes.
In this lesson you learn how to:
■ Template objects in the scene.
■ Understand the difference between objects and components.
■ Edit objects at their component level.
■ Assign surface material attributes
■ Access the Attribute editor
Polygon Modeling
Lesson 1: Modelling a polygon mesh.
In this lesson you’ll be introduced to some of the polygon modeling tools
Maya provides by learning how to:
■ Use 2D image planes as a reference for constructing 3D models
■ Use 3D primitives as the basis for creating more complex models
■ Work with the components of a polygon mesh (faces, edges, and vertices)
■ Smooth a polygon mesh
■ Select the faces, edges, and vertices of polygonal meshes
■ Create polygon faces by placing vertices
■ Scale and extrude faces on a polygon mesh
■ Move and rotate extruded polygonal meshes
■ Split vertices and subdivide polygonal faces
■ Combine separate meshes into one mesh
■ Bridge between meshes
■ Add faces to an existing mesh
■ Use Snap to Grid
■ Preview a smoothed high resolution version of a polygon mesh
■ Harden and soften polygon edges
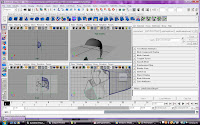
Beginning to create the outer shell:

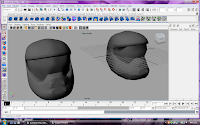
The final render:
The helmet on the left is the final render. The one to the right was its original outline. These two were linked which ment if i edited the right one to make more define edges, the left one would change appropriately and allow for a more smoother render.

Lesson 2: Sculpting a polygon mesh.
In this lesson you’ll be introduced to some of the polygon modeling options
Maya provides by learning how to:
■ Use reflection to perform symmetrical transformations to your model
■ Use Soft Select to transform components with falloff
■ Modify the falloff area and shape
■ Create a custom falloff shape
■ Select components using Marquee select and Drag select
■ Use Camera based selection to limit the components you select
■ Use the Split Edge Tool to separate edge rings
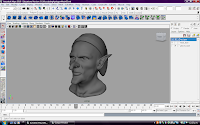
This was a tutorial that supplied the model of a head. The tasks were then designed to turn it into a Goblin.
I have a few software issues with this task. Several times when trying to use the soft modification tool, maya would completely shut down.

No comments:
Post a Comment